Pelvic Floor Foundations
A progressive four-step series, breathing, pelvic tilts, bridges, heel slides, that builds pelvic-floor coordination, endurance and strength. Movement paired with imagery, on a mat, never holding the breath.
Your pelvic floor is part of your deep core, and like any muscle group, it responds to coordination before strength. This progressive, four-step series builds that connection with gentle movement and a little targeted imagery. Practise on a comfortable mat, and remember the two rules beneath all of it: never hold your breath, and never squeeze your glutes.
1. Diaphragmatic Breathing · The Foundation
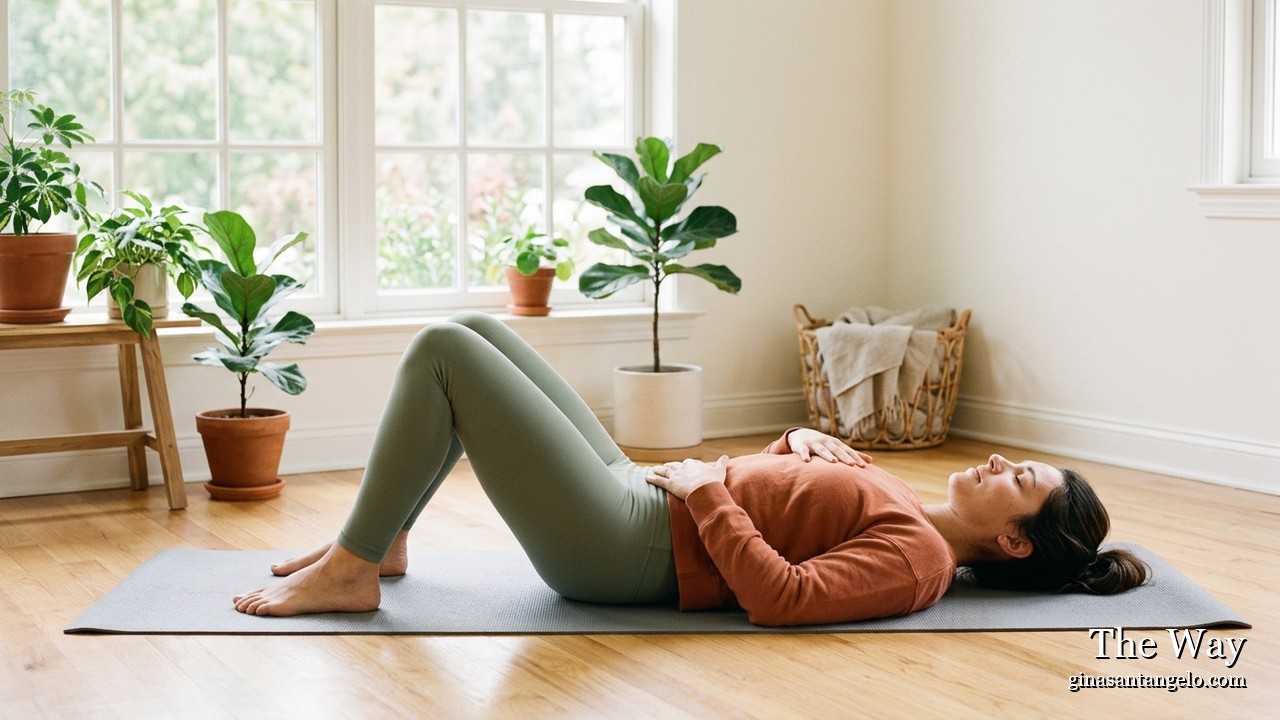
Set up. Lie flat on your back, knees bent, feet flat. Place one hand on your chest and one on your belly.
Inhale. Breathe deeply into your lower ribs and belly. Picture your pelvic floor opening and softening like an elevator descending gently to the basement.
Exhale. Exhale slowly through your mouth. Imagine your pelvic floor lifting up toward your head, like the elevator rising back to the top floor.
Do: 10 slow, controlled breaths.
2. Supine Pelvic Tilts · Coordination
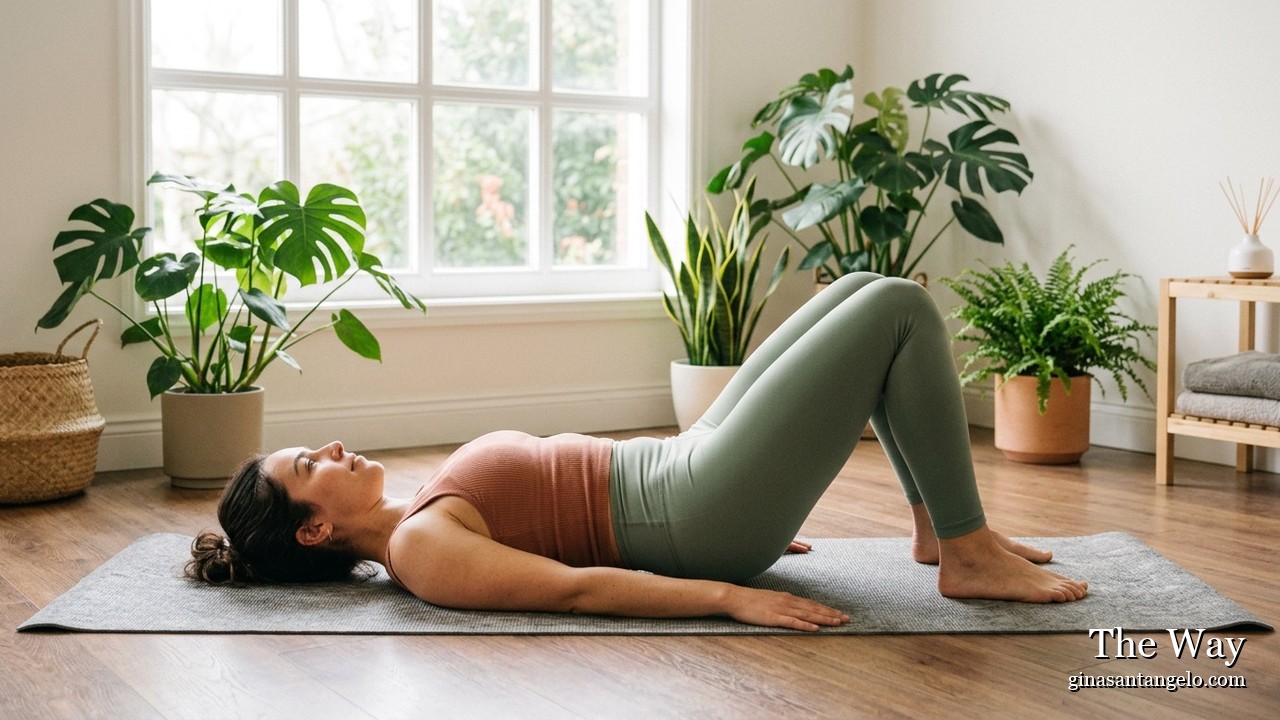
Set up. Stay on your back, knees bent, pelvis in neutral.
Inhale. Relax your stomach and let your lower back arch gently away from the floor.
Exhale. Draw your navel toward your spine and tilt the pelvis back, as if closing a tight pair of high-waisted pants, drawing the pubic bone toward the tailbone and lifting the pelvic floor inside.
Do: 2 sets of 10 repetitions.
3. Progressive Glute Bridges · Endurance
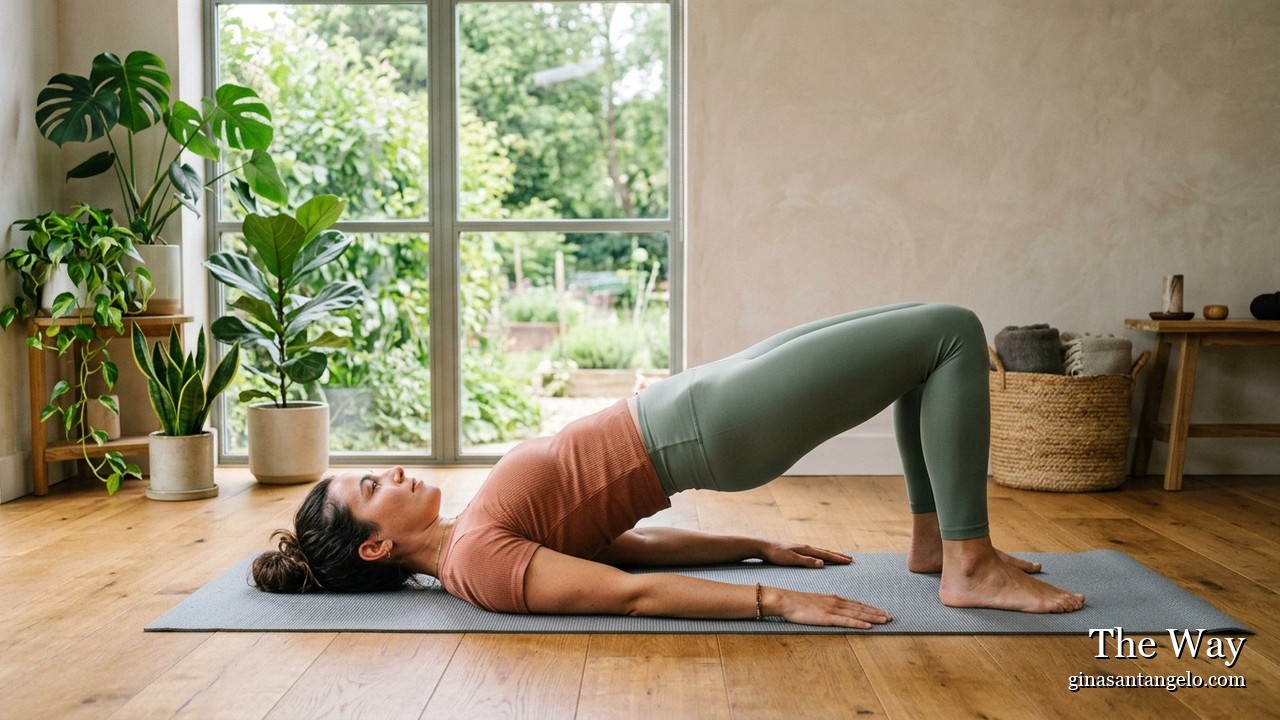
Set up. On your back, knees bent. For deeper core work, place a small Pilates ball or rolled towel between your knees.
Inhale. Breathe in and let the body expand and relax.
Exhale. Gently squeeze the ball or towel. Initiate the lift by imagining you are scooping up a marble, or holding back a sudden rush of gas, then peel the spine off the floor segment by segment until the hips are high.
Do: 10 repetitions, pausing at the top for a full breath cycle.
4. Alternating Heel Slides · Stability
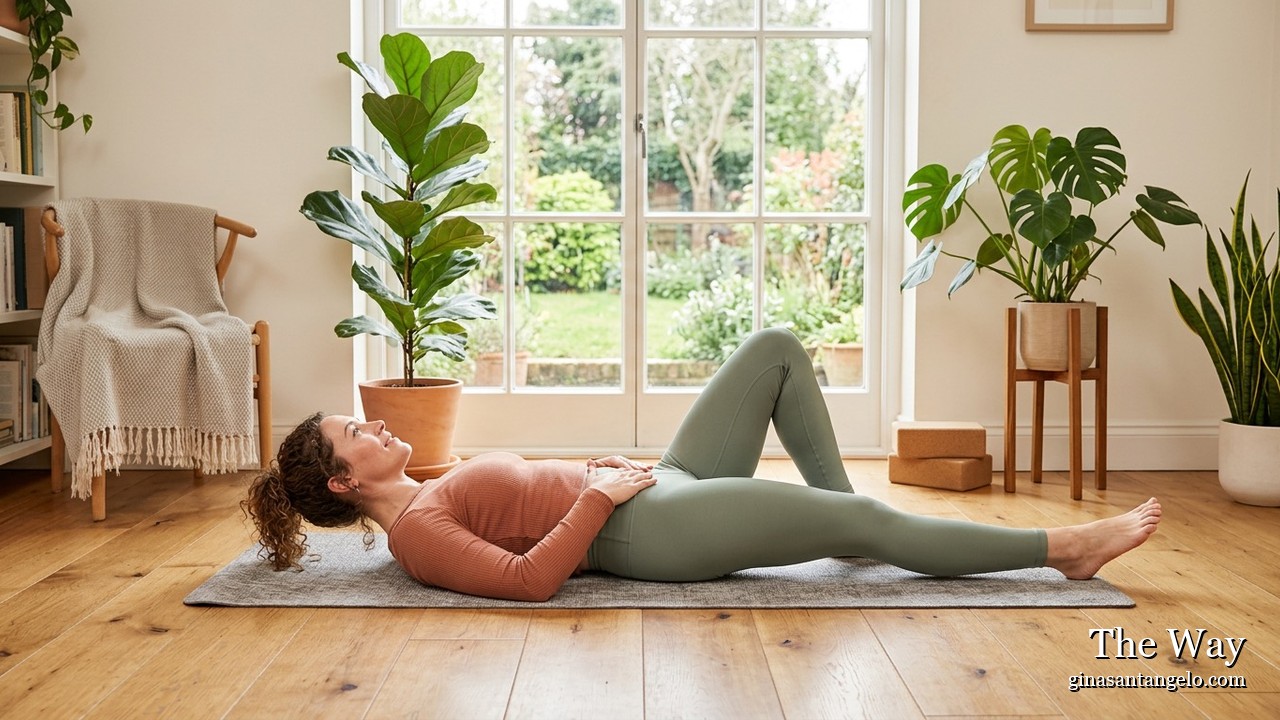
Set up. Lie on your back, knees bent, arms resting flat at your sides.
Inhale. Inhale to fill the lungs and relax the abdominal wall.
Exhale. Draw the pelvic floor up and lock in your core, imagine your two sitting bones drawing tightly toward one another. Hold that support as you slowly slide one heel straight out, then inhale to slide it back. Alternate sides.
Do: 10 slides per leg.
Key alignment checkpoints
Relax the superficial muscles. Don’t squeeze your buttocks or outer thighs, the movement should feel entirely internal.
Keep texturing your breath. Count out loud or hum if you catch yourself holding it, you should never hold your breath.
Prioritise the release. The relaxation phase of each repetition matters as much as the squeeze; over-tightening is its own problem.
Visual guide
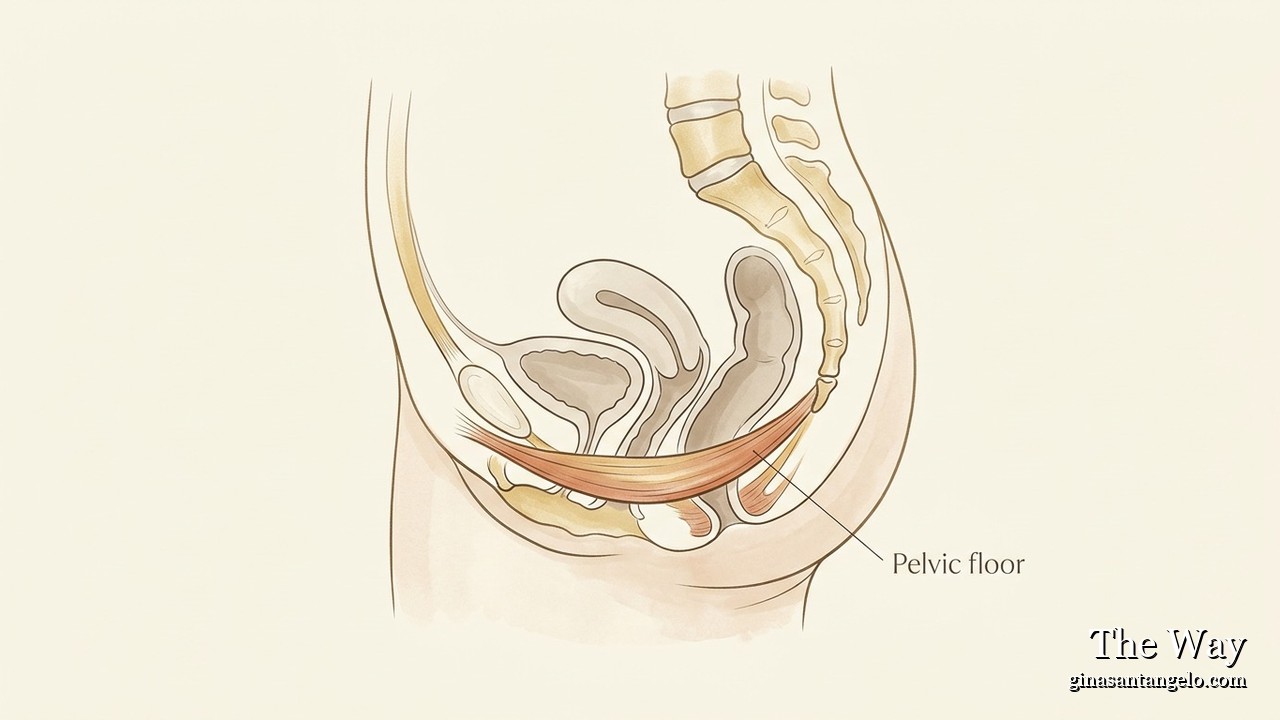
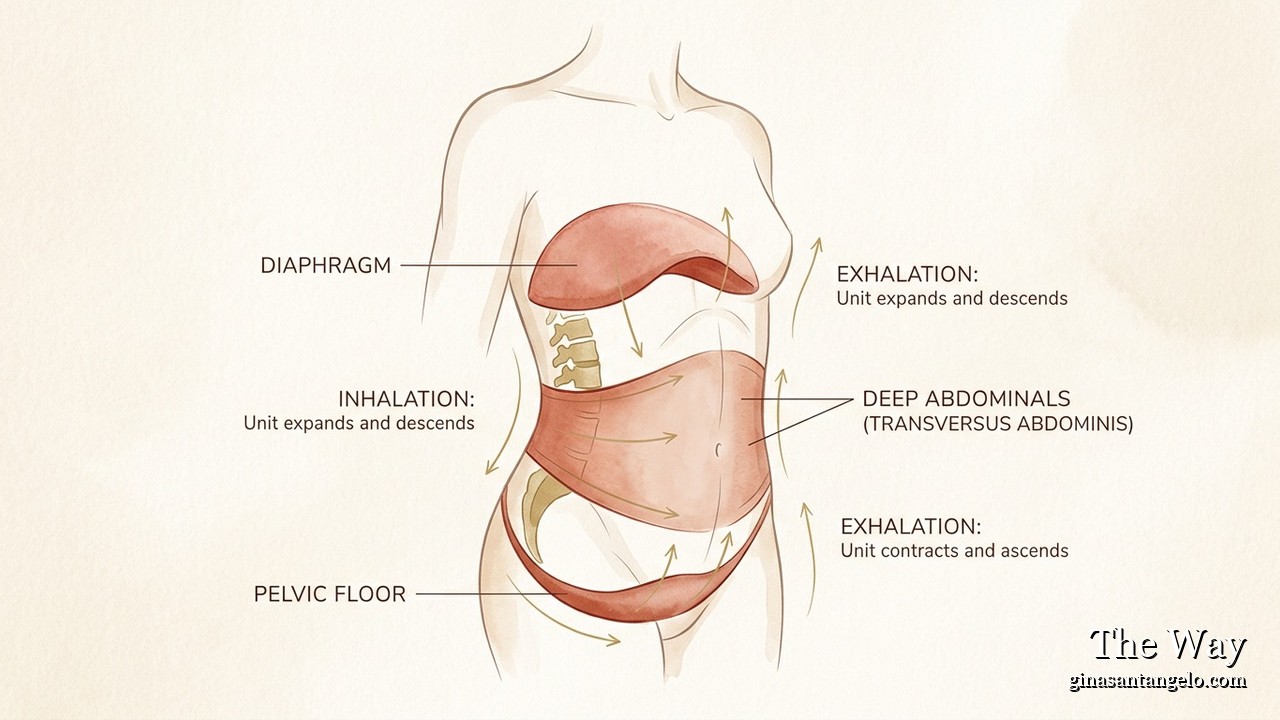
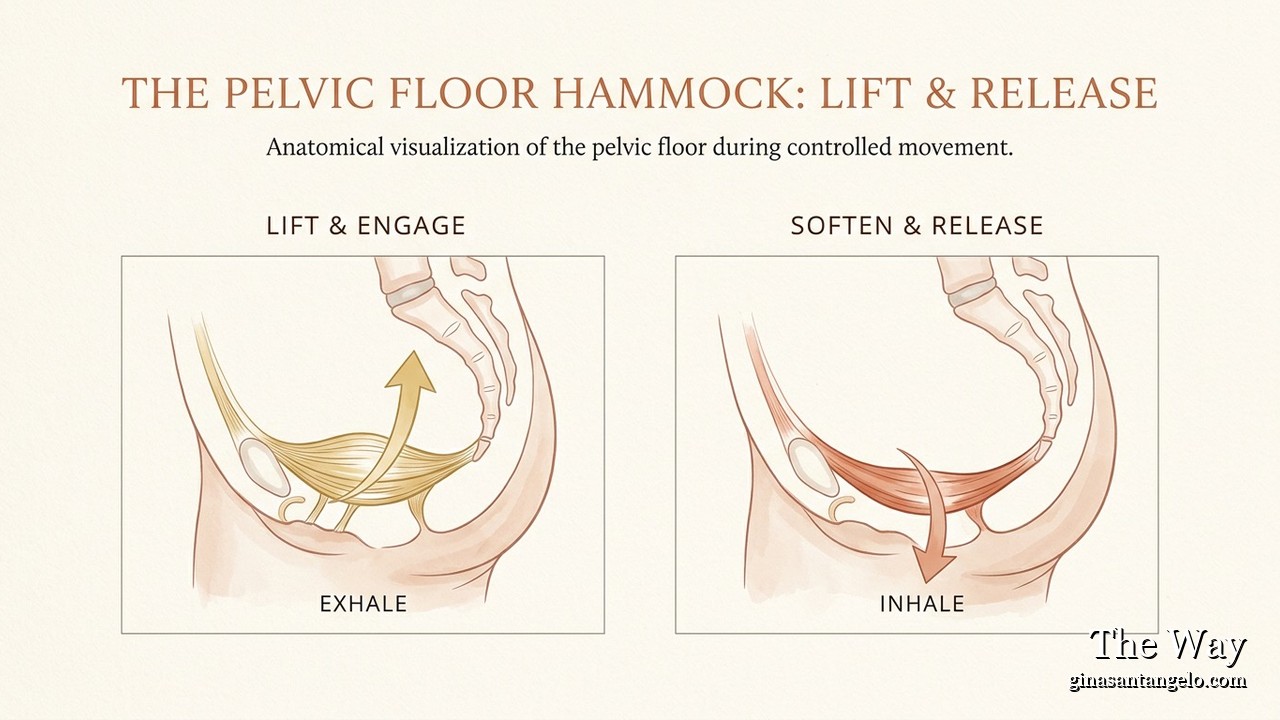
How to read it: the Postpartum Core panel shows the flat-back positioning for gentle tilts and the straight-leg alignment for heel slides; the Kegel & Bridge and Internal Kegel Cue diagrams show the lifting mechanics of the inner pelvis and proper form at the top of a bridge.
How to progress
Only advance once you can complete the base routine effortlessly, no held breath, no neck strain, no gripping glutes.
Breathing. Move from lying down to a seated position on a firm chair, or a kneel. Now the pelvic floor has to work against gravity as it drops and lifts.
Pelvic tilts. Lift both feet into a tabletop position (knees bent 90° over the hips) as you tilt. Imprint the low back flat into the mat using your core, not the hip flexors.
Glute bridges. Hold the top for 3–5 full breath cycles instead of one. Or loop a light resistance band around the outer thighs and press gently outward for more stability demand.
Heel slides. Hover the foot 1–2 inches off the mat instead of sliding it along the floor, and bring it back without letting the low back arch or lift.
Move through these in order, most days if you can. It is quiet, internal work, no one would know you were doing it, and it is some of the most valuable movement a woman can practise, at any age. Track it with the printable Pelvic Floor Log, and see The Pelvic Floor, Beyond Kegels for the why.
This series and its guides are for informational use only and are not a substitute for the recommendations of your medical doctor. If you are postpartum, healing from surgery or injury, or have any pelvic-floor concerns, please check with your physician or a pelvic-floor physical therapist before beginning.
Read more: The Pelvic Floor, in my own words → · Beyond Kegels → · Moving Through Pregnancy →
Download the printable version, keep it on the fridge or on your phone.